Display rules
In this article we will learn how to add rules on your banner to display it only on specific pages or to specific users.
Display based on urls
You can display your banner on specific pages of your website by adding rules based on the url of the page.
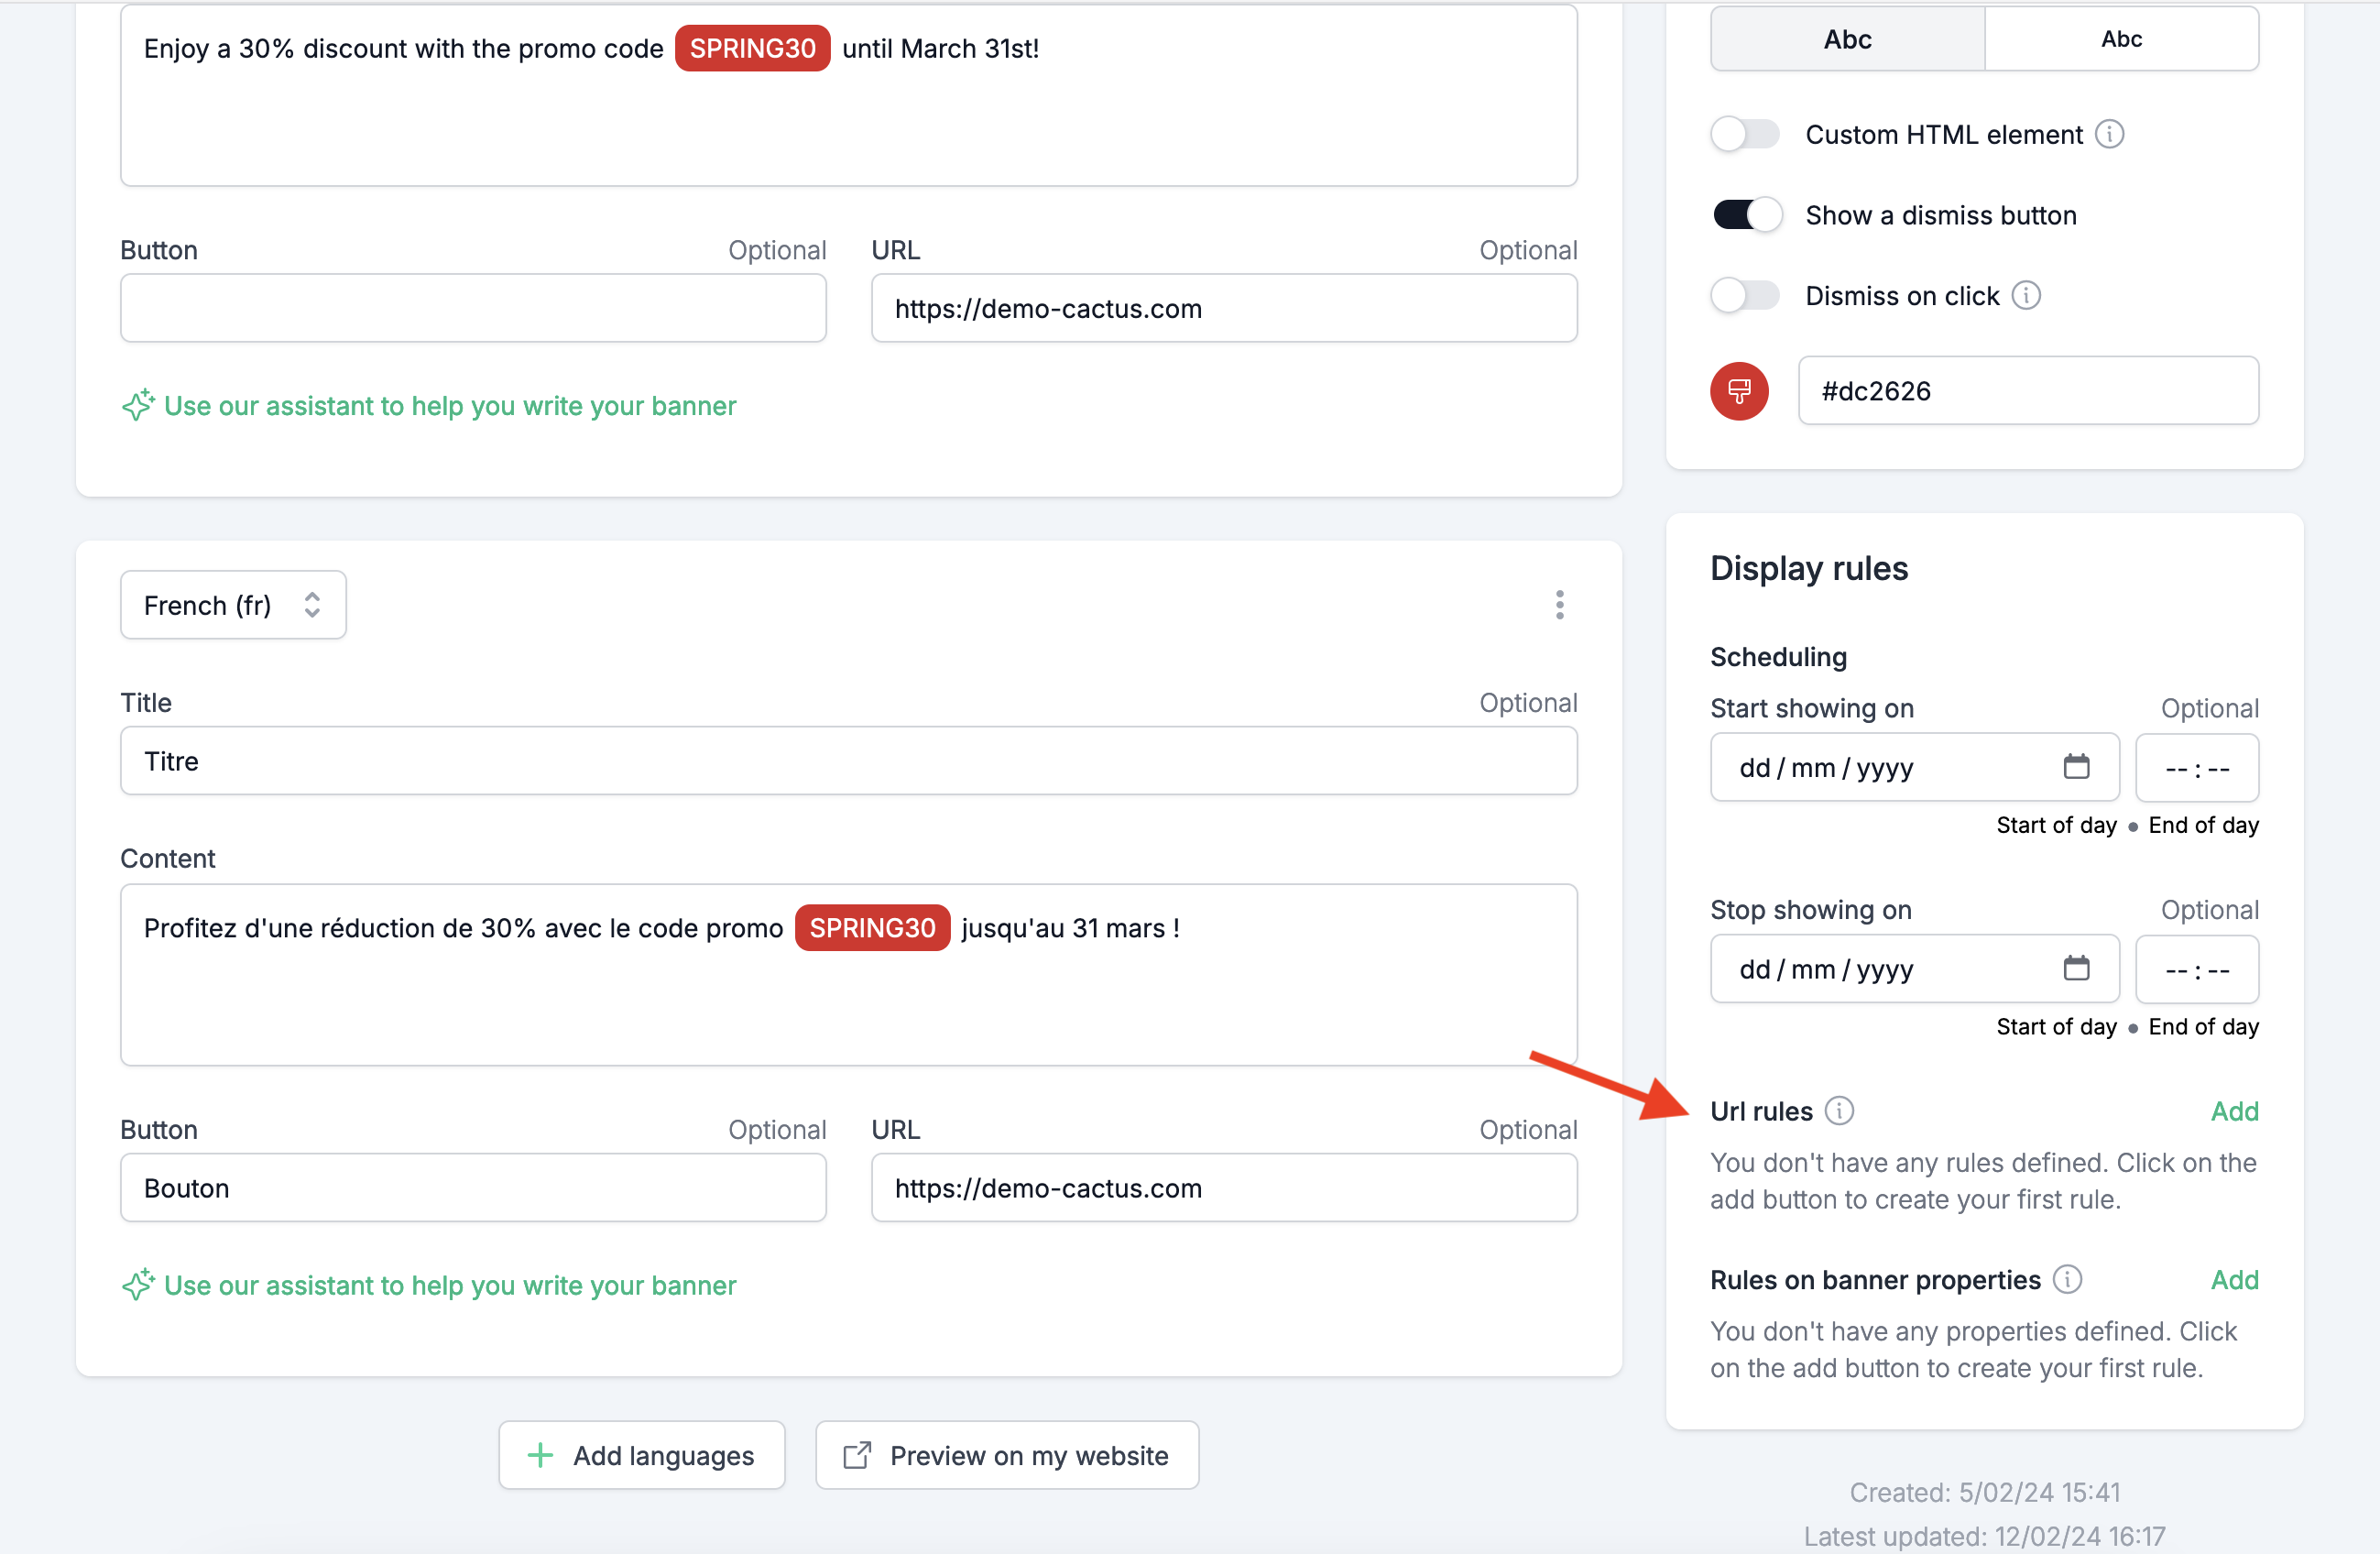
To manage your urls, locate the "Urls rules" section in the "Display rules" panel.

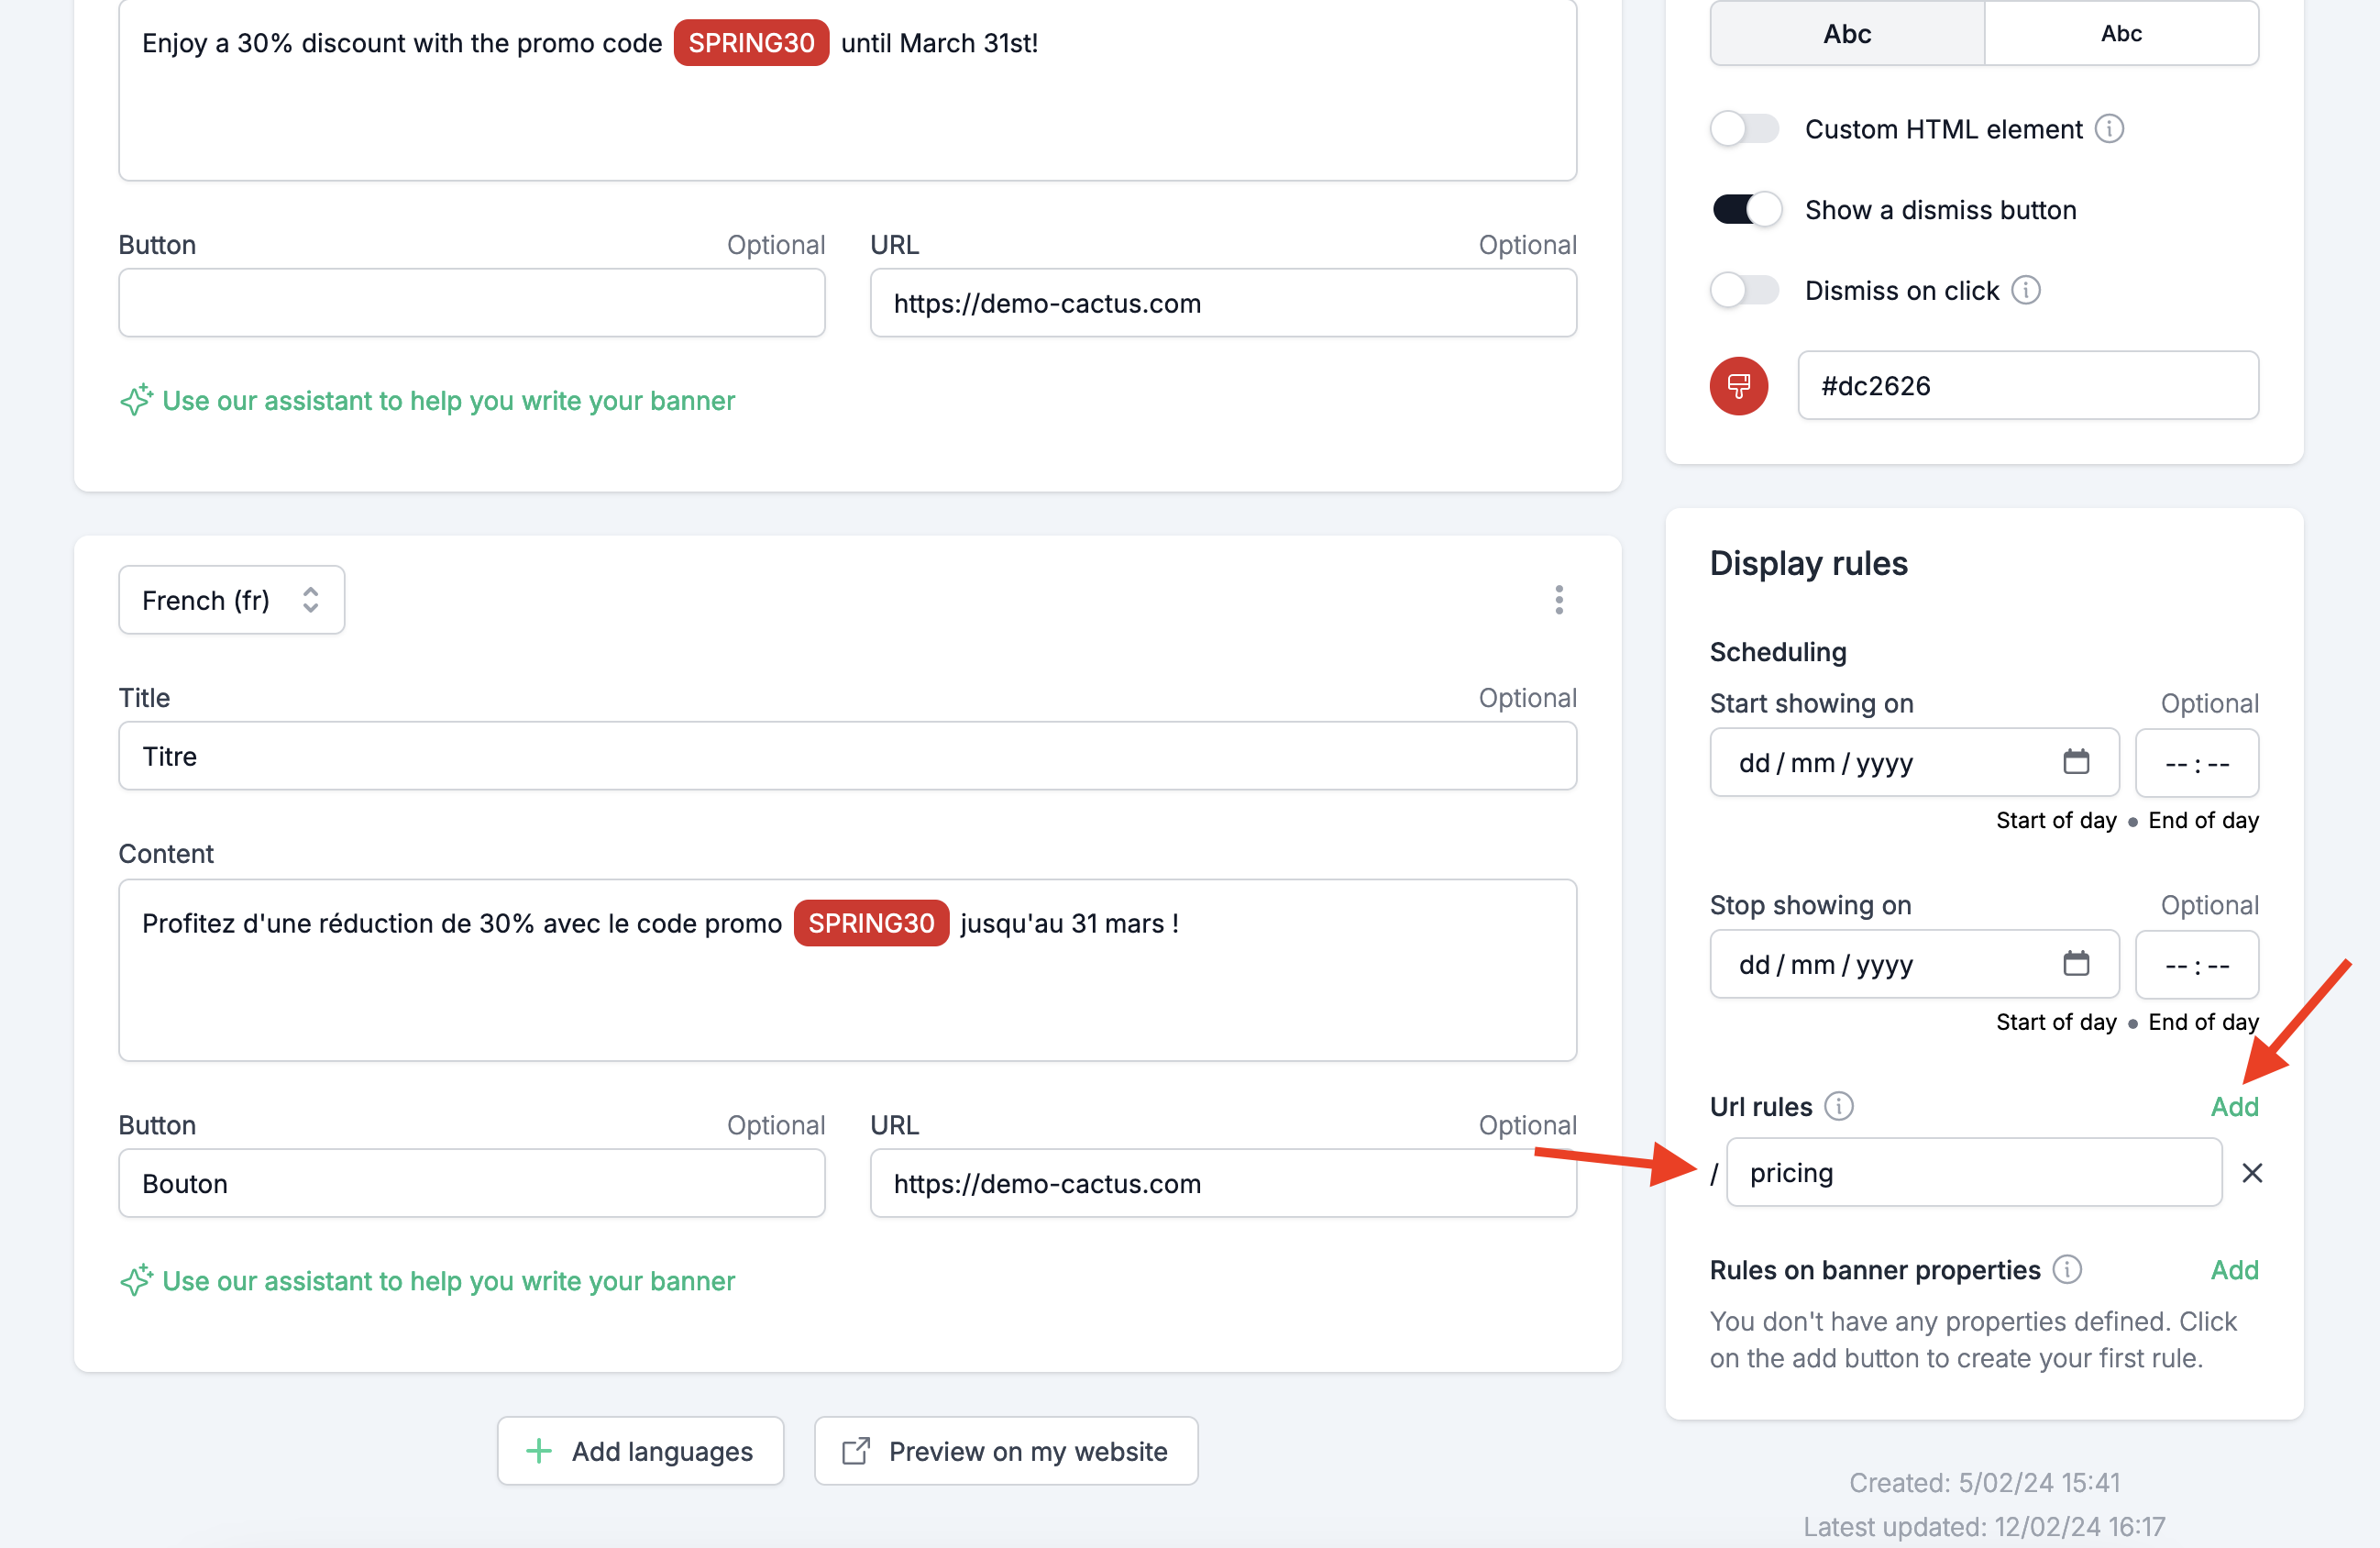
To add a new url rule, click on the "Add" button. Then, enter the url of the page you want to display the banner on.

You can enter a full path or a partial path. For example, if you want to display the banner on all the blog pages, you can enter "/blog". Your banner will then be displayed on all the pages that contain "/blog" in their url (e.g. "/blog", "/blog/post1", "/blog/post2", etc.).
You can also restrict the display of your banner to a full path or a partial path by adding the "!" character before the path. For example, if you want to display the banner on all the pages except the blog pages, you can enter "!/blog". Your banner will then be displayed on all the pages except the ones that contain "/blog" in their url.
Note that the order of the rules is important. The first rule that matches the url of the page will be used to display the banner.
Display based on properties
You can display your banner to specific users by adding rules based on the properties of the user.
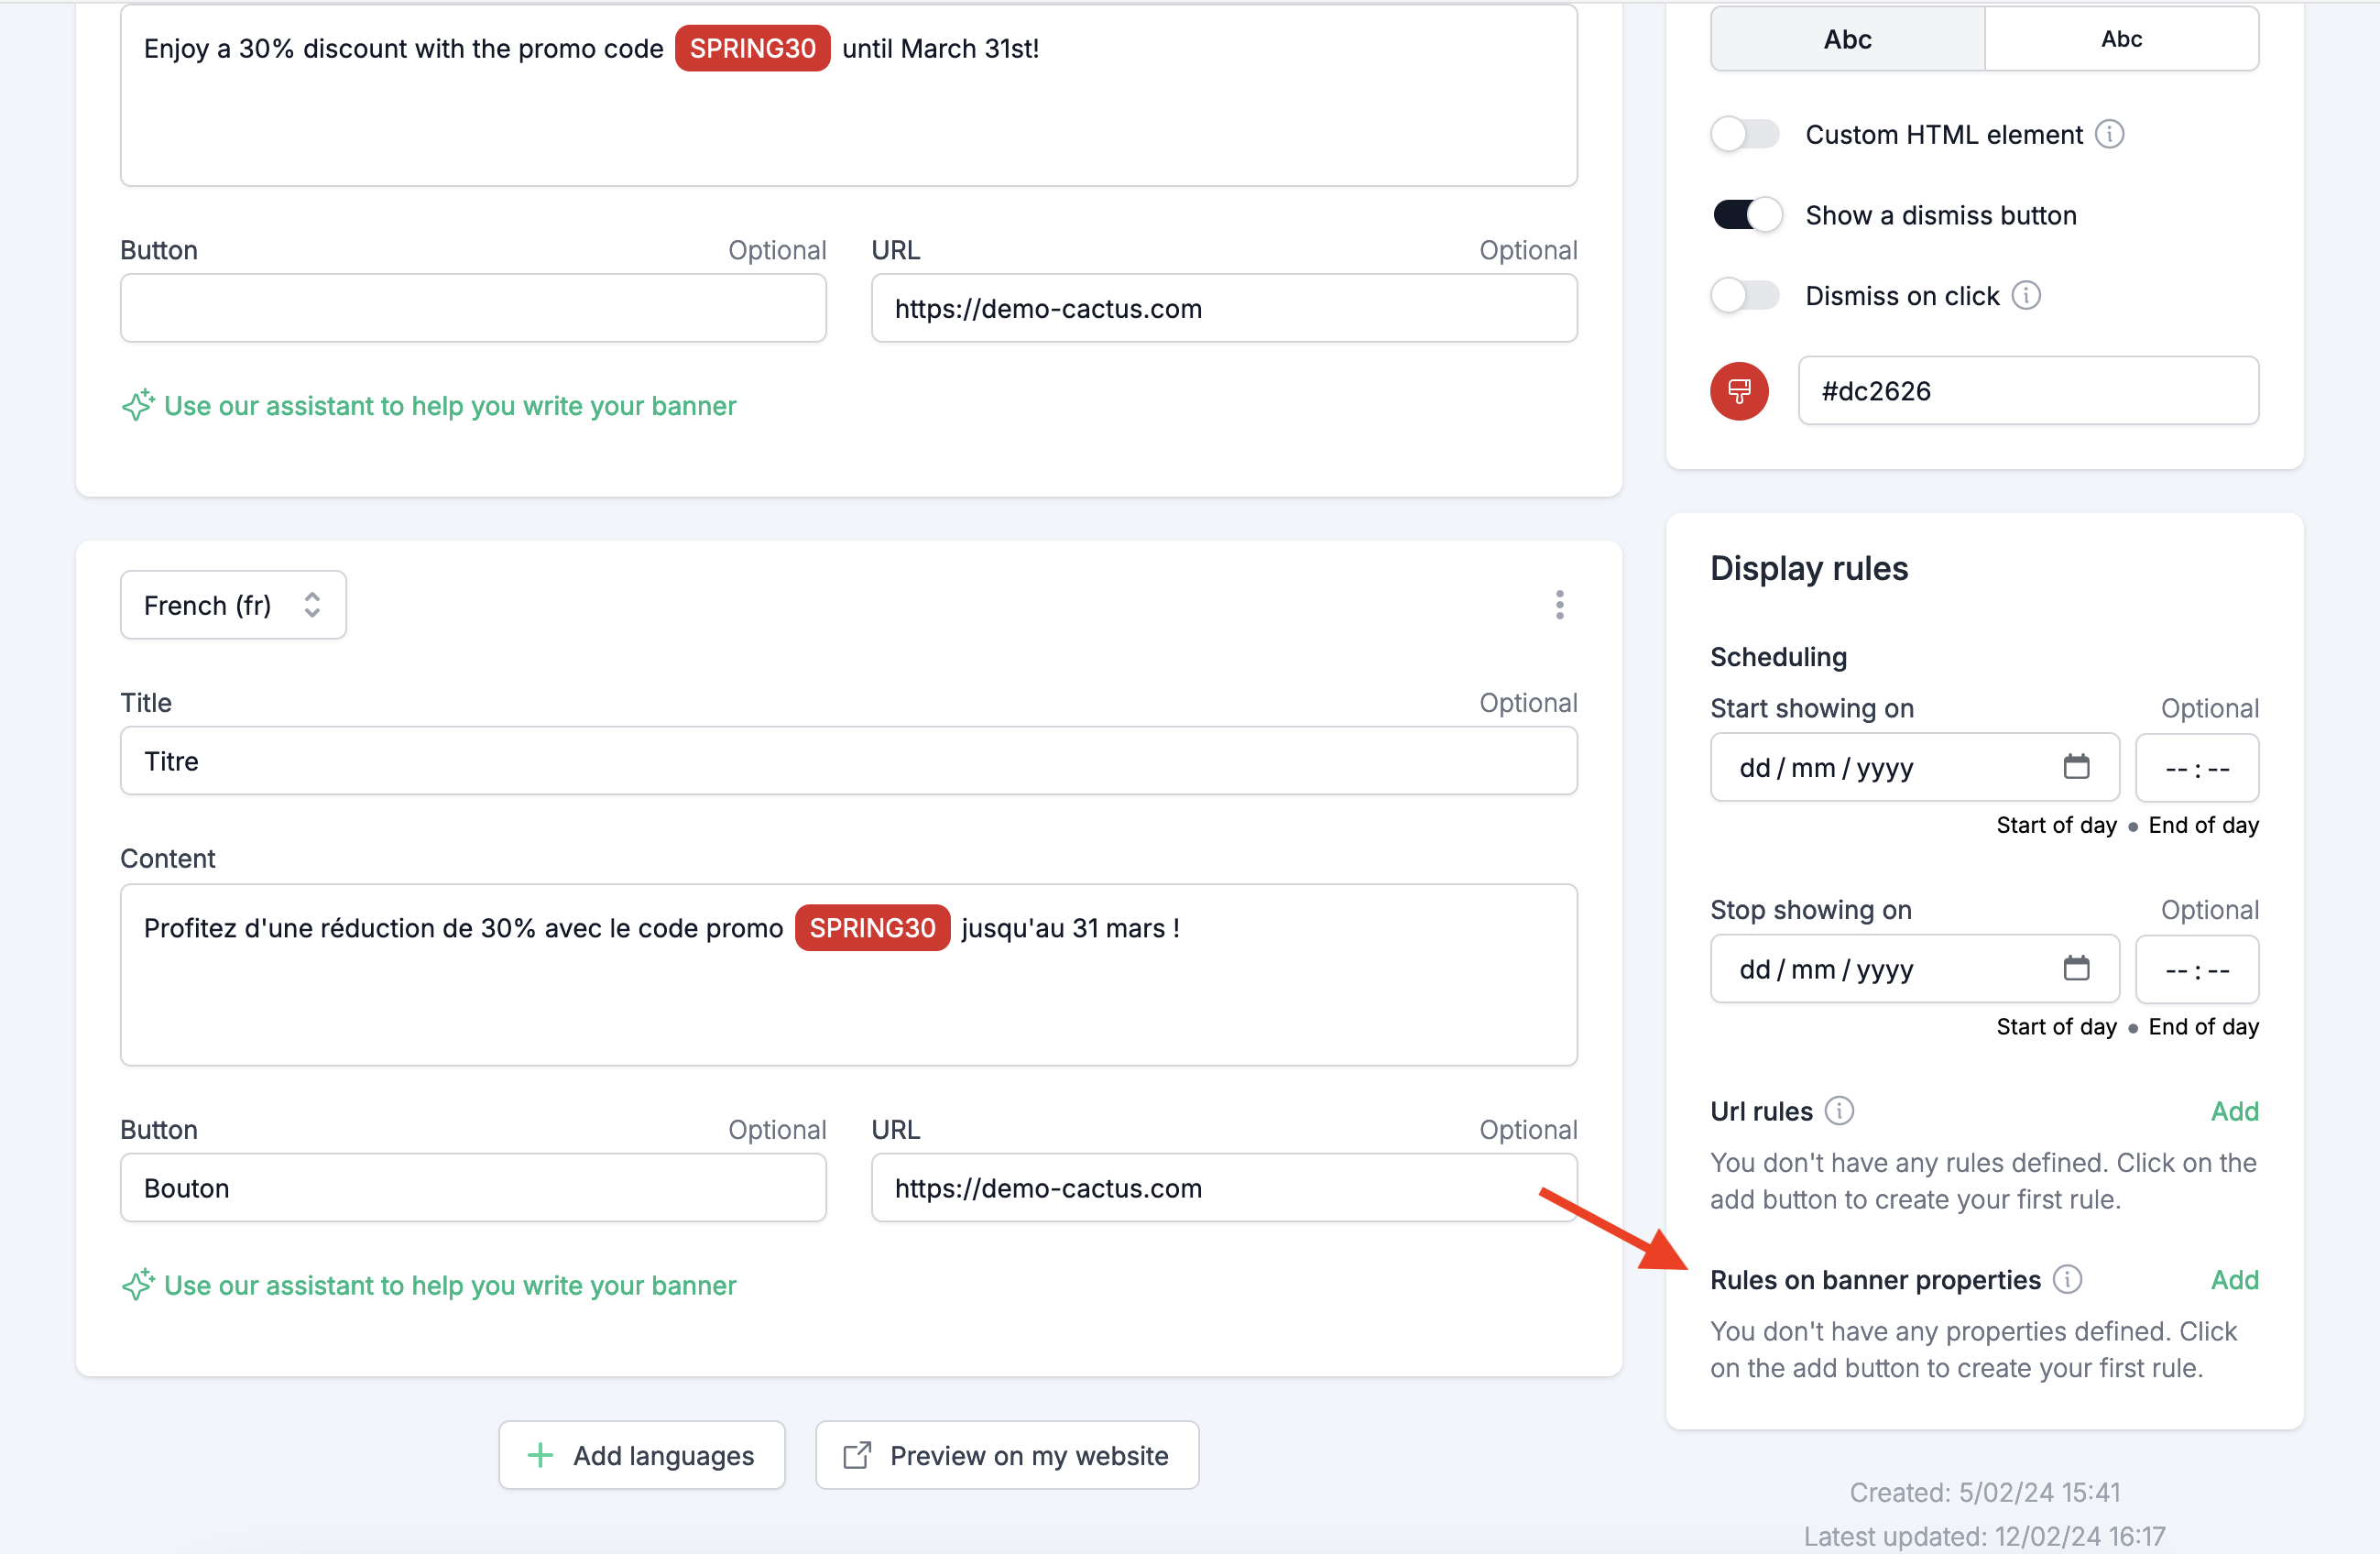
To manage your properties, locate the "Rules on banner properties" section in the "Display rules" panel.

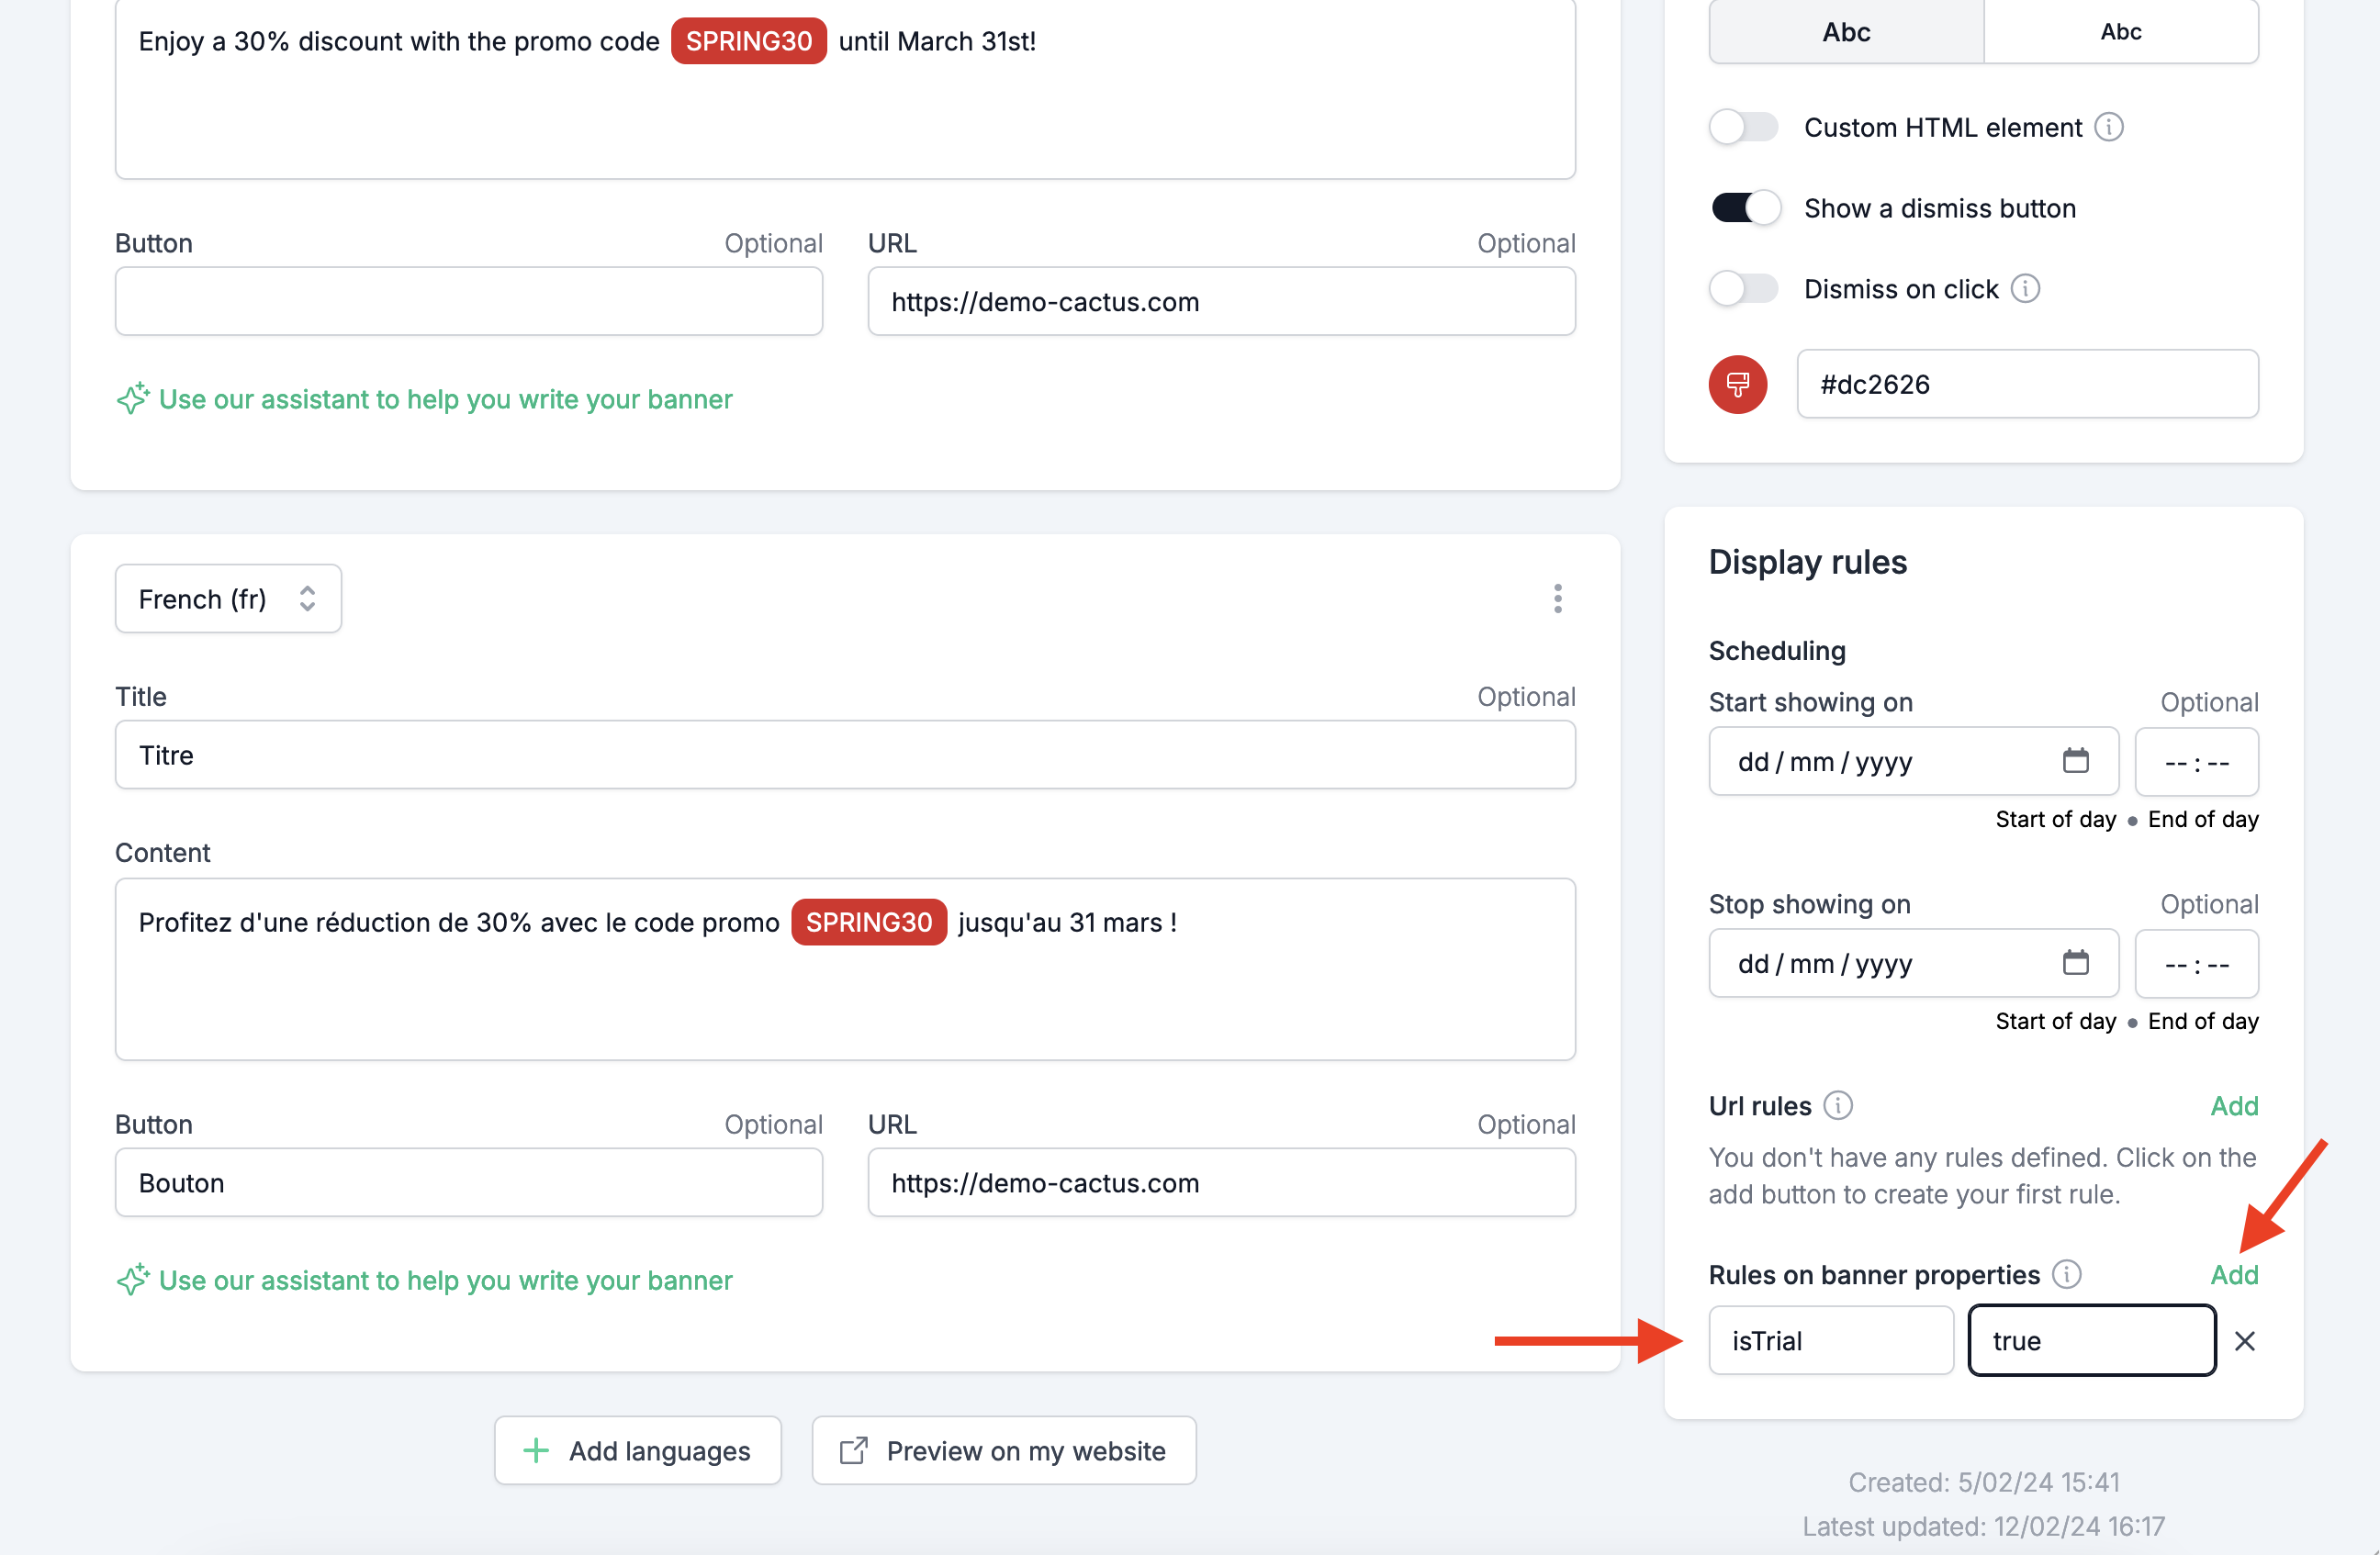
To enter a new property rule, click on the "Add" button. Then, enter the name of the property and the value you want to display the banner for.

For example if you want to display the banner to only the users that have the "isTrial" property set to "true", you can enter "isTrial" as the name of the property and "true" as the value.
Don't forget to initialize your script with the properties of the user. For more information about how to define the properties of the user when initializing the script, please refer to the Javascript API documentation.